

This is the first post in a series on how to make your own React UI Library.
What are we going to do?
- Set up a new project using Lerna for multiple packages.
- Bootstrap the skeleton project with all the packages we will need.
- Add necessary dependencies to packages.
- Wire our own centralized builder.
It might sometimes feel like we are battling with a multi-headed dragon, but bear with me as it will pay dividends in the end!
Prerequisites
- Node v10+
- npm v6+
Lerna
This tool is amazing for managing JavaScript libraries with multiple packages. The general idea is that each UI component in your library will be a completely separate and independent package that can be installed in a project. We are parting ways with a monolithic library where all the code is in a single package in favor of splitting so our clients can install only what they want™.
The recommendation is to install it globally since we are going to use a few commands from it:
npm i -g lernaCreate the initial project
# example name that I like
mkdir phoenix
cd phoenix

# Initialize empty package.json
npm init -y

# Initialize Lerna
lerna init
Example generated folder structure:
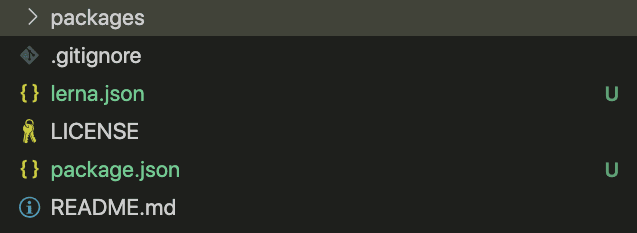
lerna.json
This is the central Lerna configuration for the packages. You can read more about the Lerna configuration here.
Default values:
{
  "packages": ["packages/*"],
  "version": "0.0.0"
}
We are going to modify it to this:
{
  "packages": [
    "packages/*"
  ],
  "version": "0.0.0",
  "hoist": true,
  "stream": true,
  "bootstrap": {
    "npmClientArgs": ["--no-package-lock"]
  }
}hoist: Makes all dependencies on packages be lifted up to the root so we deduplicate them.
stream: Prints all the inner package logs when run.
npmClientArgs: Prevents generating package-lock.json files in all the packages.
packages/
This folder will host all the code for the packages we are going to release.
Let's add some components!
npm scopes
We want to publish these packages to npm and avoid conflicts with others. Scopes are great to namespace closely related packages and provide a form of veracity, for example @babel/core, where the scope is @babel. For this example we will set the scope to @cddev.
Read more about scopes here.
Important notes
- The scope
@cddevis the one I used for this guide so it will already be taken. Go ahead and create a new one that represents your passions and interests in life :) - Before using a scope, save yourself a headache and create the organization in npm first: https://www.npmjs.com/org/create
Creating packages
Any UI library is nothing without components, so let's create a few packages using Lerna. We will create four packages for this guide:
@cddev/phoenix: This will hold all the packages together in case someone wants to make a single import.@cddev/phoenix-button: A Button component.@cddev/phoenix-text: A Text component.@cddev/phoenix-builder: A builder for all components that centralizes Rollup, Babel, PostCSS, and so on.
Note: We are going to use the default Lerna folder structure in this tutorial.
# Using --yes to skip prompts
lerna create @cddev/phoenix --yes
lerna create @cddev/phoenix-button --yes
lerna create @cddev/phoenix-text --yes
lerna create @cddev/phoenix-builder --yes
Wiring the React components with Lerna
We want to build relationships <3 within our components. For example, the main phoenix package will import all other packages and export them. We also want to add the necessary dependencies to all packages to get started. Let's do it.
# Add phoenix-button dependency into phoenix
lerna add @cddev/phoenix-button --scope=@cddev/phoenix

# Add phoenix-text dependency into phoenix
lerna add @cddev/phoenix-text --scope=@cddev/phoenix

# Add React as a dev dependency for local testing
lerna add react --dev --scope '{@cddev/phoenix-button,@cddev/phoenix-text}'

# Add React 16 as a peer dependency for consuming applications
lerna add react@16.x --peer --scope '{@cddev/phoenix-button,@cddev/phoenix-text}'

# Add an utility to toggle classes as needed on the components
lerna add clsx --scope '{@cddev/phoenix-button,@cddev/phoenix-text}'
With this you should now be able to see changes across multiple package.json files setting pointers among the packages so you can reference them.
Let's write some test React code to export from the UI components
phoenix-button/lib/phoenix-button.js
import React from 'react';
const Button = ({ children }) => <button>{children}</button>;
export { Button };
phoenix-text/lib/phoenix-text.js
import React from 'react';
const Text = ({ children }) => <p>{children}</p>;
export { Text };
phoenix/lib/phoenix.js
import { Button } from '@cddev/phoenix-button';
import { Text } from '@cddev/phoenix-text';
export { Button, Text };
The Builder
We could publish these packages as ES6, but some older clients might not understand this modern JavaScript, especially because we are using JSX. This needs to be compiled to a format that can be understood by older clients, and for that we need a bundler.
Rollup is a good option since it has a minimal API and great documentation: https://rollupjs.org/guide/en/
To build these components, wouldn't it be neat to use it like this?
"scripts": {
  "build": "phoenix-builder"
}
In this case the builder will be aware of everything passed to it from the context where we call it.
For this we are going to create a command-line executable in Node: https://developer.okta.com/blog/2019/06/18/command-line-app-with-nodejs
Let's modify our @cddev/phoenix-builder/package.json to let Node know we are exposing an executable from this package. In this case the executable is phoenix-builder.
phoenix-builder/package.json
"bin": {
  "phoenix-builder": "./lib/phoenix-builder.js"
},
Next, we need to make changes in phoenix-builder.js with a dummy command to test things out:
phoenix-builder/lib/phoenix-builder.js
#!/usr/bin/env node
console.log('Woo');
Finally, make the JavaScript executable:
chmod +x packages/phoenix-builder/lib/phoenix-builder.jsWe should be able to wire phoenix-builder to our individual components so we have the builder centralized with its own configuration and can run it for each component.
lerna add @cddev/phoenix-builder --dev --scope '{@cddev/phoenix,@cddev/phoenix-button,@cddev/phoenix-text}'Then modify all these packages with a new build script. For example, phoenix-button/package.json:
"scripts": {
  "build": "phoenix-builder",
  "test": "echo \"Error: run tests from root\" && exit 1"
},
Next, we should be able to do a test run:
lerna run buildYou should see the three Woo messages in the console signaling that it worked.
Troubleshooting: If you get a phoenix-builder: command not found error, make sure you are exporting the bin command in the phoenix-builder package.json.
To make running the script easier, modify the root package.json and add:
"scripts": {
  "build": "lerna run build"
}
With this, we can run npm run build at the root without having to call lerna every time.
Compile the JavaScript with Rollup
Now that we have the builder wired up we can start adding Rollup and all the dependencies we need to compile our code.
Unfortunately Lerna does not support adding multiple packages in one command... sigh.
lerna add rollup --scope=@cddev/phoenix-builder
lerna add @babel/core --scope=@cddev/phoenix-builder
lerna add @babel/preset-env --scope=@cddev/phoenix-builder
lerna add @babel/preset-react --scope=@cddev/phoenix-builder
lerna add @rollup/plugin-babel --scope=@cddev/phoenix-builder
lerna add @rollup/plugin-node-resolve --scope=@cddev/phoenix-builder
You should now have all the necessary dependencies to write phoenix-builder.js.
We are going to use the JavaScript API in Rollup and produce two bundles:
- CommonJS (CJS) for older clients.
- ECMAScript Modules (ESM) for newer clients.
Let's start by modifying phoenix-builder.js with the following code:
phoenix-builder/lib/phoenix-builder.js
#!/usr/bin/env node
const rollup = require('rollup');
const path = require('path');
const resolve = require('@rollup/plugin-node-resolve').default;
const babel = require('@rollup/plugin-babel').default;

const currentWorkingPath = process.cwd();
const { main, name } = require(path.join(currentWorkingPath, 'package.json'));
const inputPath = path.join(currentWorkingPath, main);
const fileName = name.replace('@cddev/', '');

const inputOptions = {
  input: inputPath,
  external: ['react'],
  plugins: [
    resolve(),
    babel({
      presets: ['@babel/preset-env', '@babel/preset-react'],
      babelHelpers: 'bundled',
    }),
  ],
};

const outputOptions = [
  { file: `dist/${fileName}.cjs.js`, format: 'cjs' },
  { file: `dist/${fileName}.esm.js`, format: 'esm' },
];

async function build() {
  const bundle = await rollup.rollup(inputOptions);

  for (const options of outputOptions) {
    await bundle.write(options);
  }
}

build();
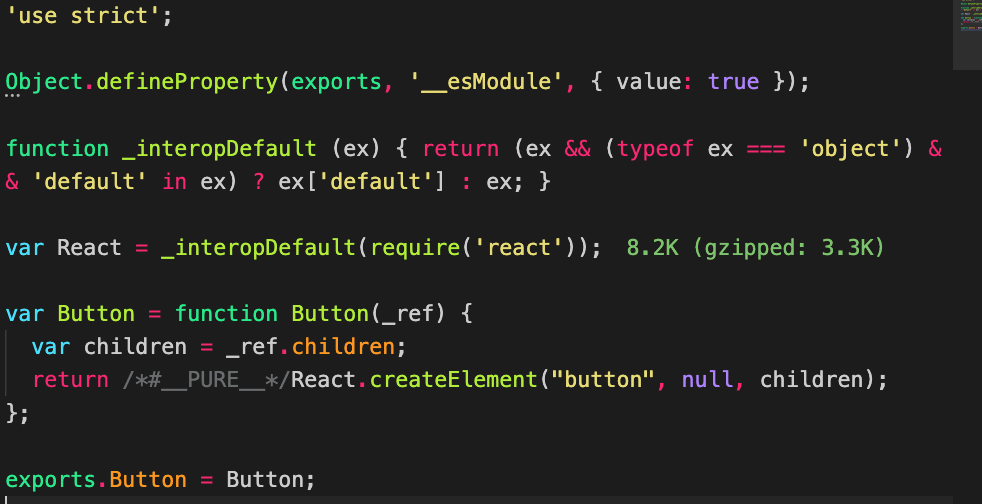
Now you can run:
npm run buildYou should see compiled versions of the components in each UI component package.
Conclusion
By now you should have a small library with two React UI components, one single library that imports them, and a centralized builder. This is the skeleton of the overall UI Library. In the next parts we will work on adding kitchen-sink documentation tooling, CSS Modules support, and the final touches needed to distribute it.